Preparing for TORUS App Development (C#)
In this document, we will implement a simple TORUS App using C# with Visual Studio 2022. For C++, please refer to the TORUS manual.
Creating a Project
Create a C# project. After creating the project, change the build mode to x86 (32-bit). TORUS only supports 32-bit builds.

Copying the TORUS API Libraries
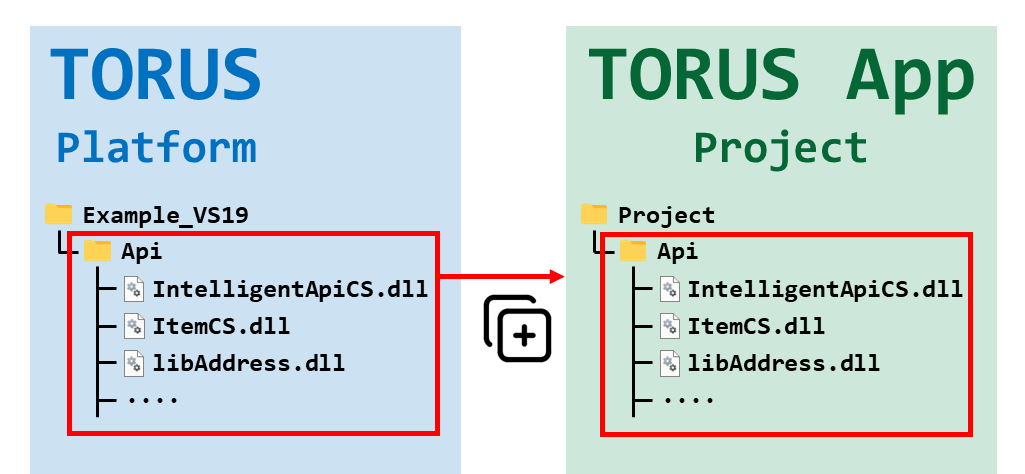
To develop a TORUS App, you need to use the TORUS API. The TORUS API library files are located in the [TORUS Install Folder]/Example_VS19/Api folder. Copy this folder to a desired location within your C# project. If you are using C#, it is sufficient to copy only the *.dll files. These library files are also located in the [TORUS Install Folder]/Binary folder, so if your TORUS App is placed within the TORUS platform folder (as is the case with the provided CommandTester), you don’t need to manage them separately. However, if your TORUS App has a separate execution/installation path or if you are debugging, you must include the library files (Application Local Deployment).
Referencing the TORUS API Libraries
To use the TORUS API in your project, you need to reference the necessary libraries. The two libraries you need to reference in C# are IntelligentApiCS.dll and ItemCS.dll. The other libraries are loaded at runtime by these two libraries.
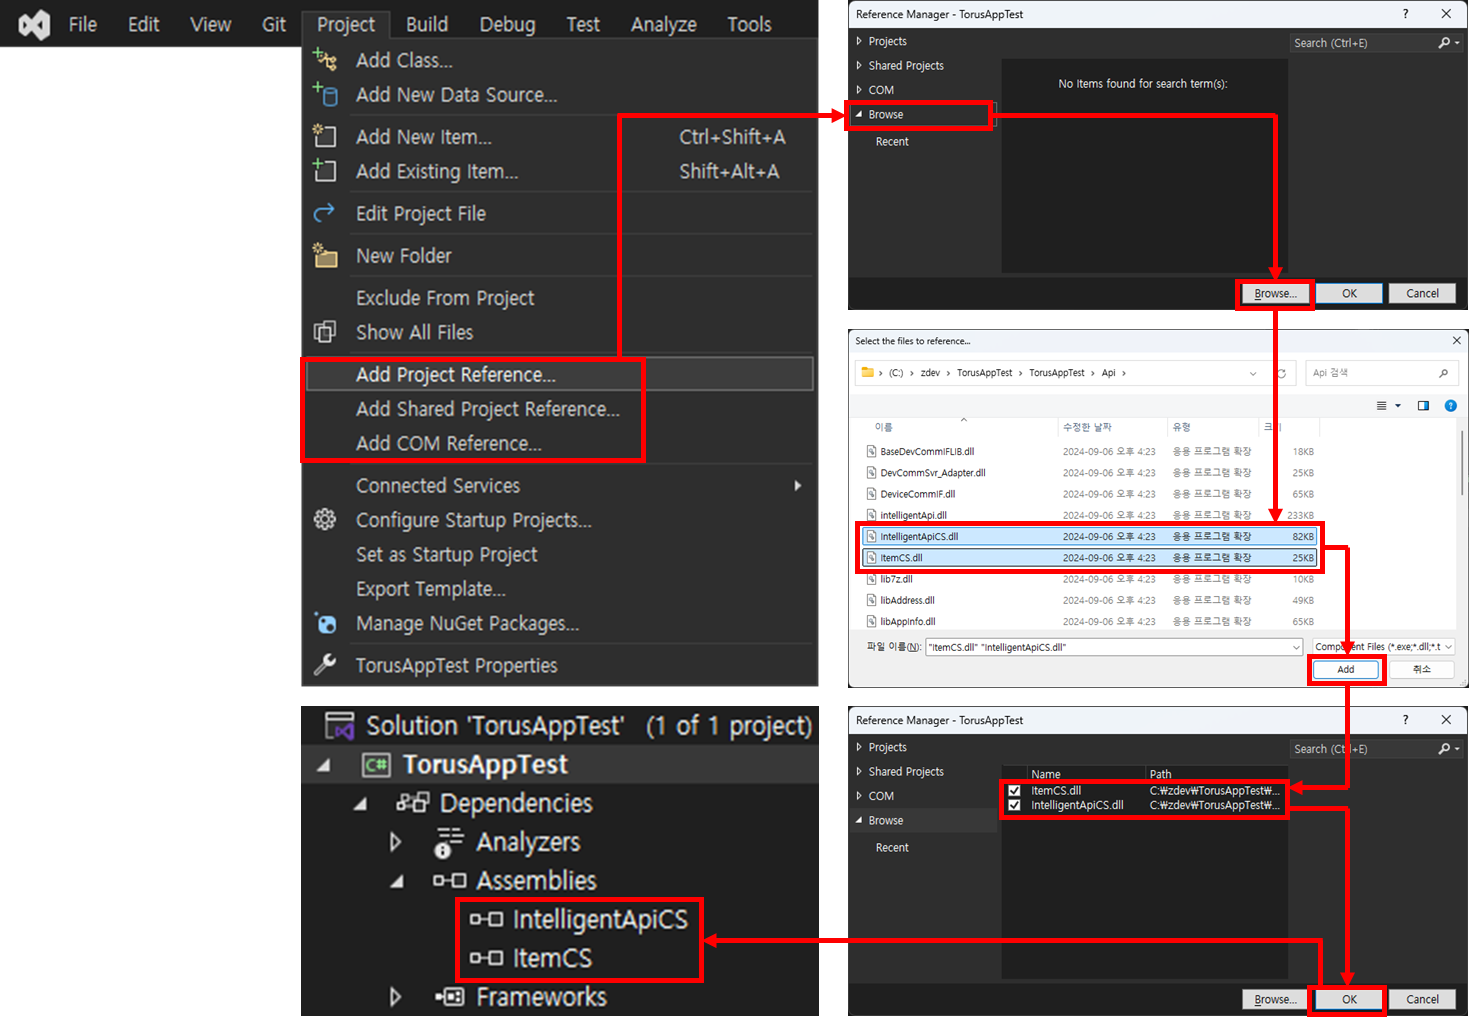
Once you’ve added the references, include the following using directive in your source code:using IntelligentApiCS;
All the C# classes of the TORUS API are defined in the IntelligentApiCS namespace.
Now you can use the TORUS API. To connect the TORUS App to the TORUS platform, use the Api.Initialize() function. For details on how to use this function, please refer to the TORUS manual or the "TORUS API Functions" section in the documentation.